

The Reptile Room
- Nicholas Meyer
- Oct 17
- 6 min read

Like most, as I’ve kept reptiles over the years, my keeping philosophy, style, and tools have evolved. And a lot of money has been spent. A lot. Holy crap, its a lot of money; its bad.
When I returned to the world of reptiles in my adulthood, the community was bigger, more advanced, and full of options in regards to how to properly care for reptiles. This was in stark contrast to the reptile hobby of my youth in the 1990s.
I wanted to truly invest in my reptiles at this point in my life. "bioactive" was all the rage when I rejoined the hobby about seven or eight years ago. Also, PVC enclosures were very new to me. I had a bunch of Vision enclosures from my youth, but things were problematic with those. They were beat-up, they sagged in places, and I always hated how inevitably the heat lamps would tip backwards within the built in heat lamp well. And while they were stackable, there was always a slight gap here and there that made the stacked enclosures look kinda sloppy. Don’t get me wrong, Vision cages have a crap-ton of pros, but they weren’t really the “vision” of where I wanted to go with my reptile keeping at this point (pun intended). I will say tho, Vision revealed a new product at the 2025 Tinley Park NARBC convention that has me really interested – maybe I’ll become a customer again.
Anyway, Animal Plastics, Universal Rocks, and The BioDude were where I was headed. It started with Irwin my Ackie Monitor from Rare Earth. And it was a lot of fun. Sure, the lead time for the Animal Plastics enclosure was bananas, but once I received the enclosure, it was game on. I installed the Universal Rocks background, did some spray foam techniques learned from YouTube, and got all the plants, substrate, and cork bark from The BioDude placed in the enclosure. I added Irwin and it was just friggin’ great. There is something to be said for a naturalistic, bioactive enclosure; seeing a reptile display natural behaviors and explore is very fulfilling. I repeated this process for all of my other reptiles – Animal Plastics enclosure, Universal Rocks background, and lots of stuff from the BioDude. Most notably at the time was the build of a large bioactive enclosure for my Northern Pine Snake Agro. It was simply awe inspiring to see him burrow, climb, and interact with his enclosure; I felt like I finally did right by Agro. (check out my blog about Agro when you have a chance).

As my Animal Plastics PVC enclosure, bioactive, naturalistic journey continued, I introduced Mist King systems to my Geckos, Amazon Tree Boas, and New Guinea Frilled Dragons. I also introduced Herpstats by SpyderRobotics. Things were really coming together in my Reptile Room. I was getting species-specific temperatures and humidity dialed in; plants were growing in. Springtails and Isopods were multiplying. Hell, if fungus gnats found their way in to the room by hitchhiking on a plant, I had a little spider population established to knock down any outbreaks. Years went by just fine; animals were thriving. So were the plants and bugs.
But everything comes to an end. Bioactive is great. But what I found it to be a bit harder to maintain than the YouTubers might have you believe. And apart from digging, burrowing, etc., I wasn’t convinced that I couldn’t provide enrichment for my animals in a way that was more sanitary, easier to clean, and frankly less fussy then some bioactive plants can be in regards to their care.
And while the naturalistic look is appealing, its simply not necessary.
So I set myself down a new path…
I wanted the enclosures in my reptile room to be practical; I wanted them to easily cleaned and sanitized as well as enriching for my reptiles. Then I’ll reserve the naturalistic bio active enclosures for a few a few locations around my home; bring some life and nature to some common areas around the house.
This was going to be a slow process. And because I had all of these naturalistic enclosures built already – permanently built with backgrounds, etc. – I needed new enclosures. And although I loved and still do love Animal Plastics, the lead times for an enclosure just wouldn’t cut it.
Enter BlackBox Cages.
At the time, BlackBox had a two week lead time. And they were super responsive and opened to some custom stuff I wanted. For example, I wanted a large 4’ wide x 2’ deep x 6’ high enclosure for my Frilled Dragons. Yeah, Blackbox had something that would work, but the freight charges were bonkers. So instead I asked them if they could simply take a 4’ wide x 2’ deep x 2’ high enclosure and cut out the top of one, the top and bottom of another, and then just the bottom of one more, and then I would stack all three into one big enclosure. They did and it worked and I saved some cash because there was no freight charge.

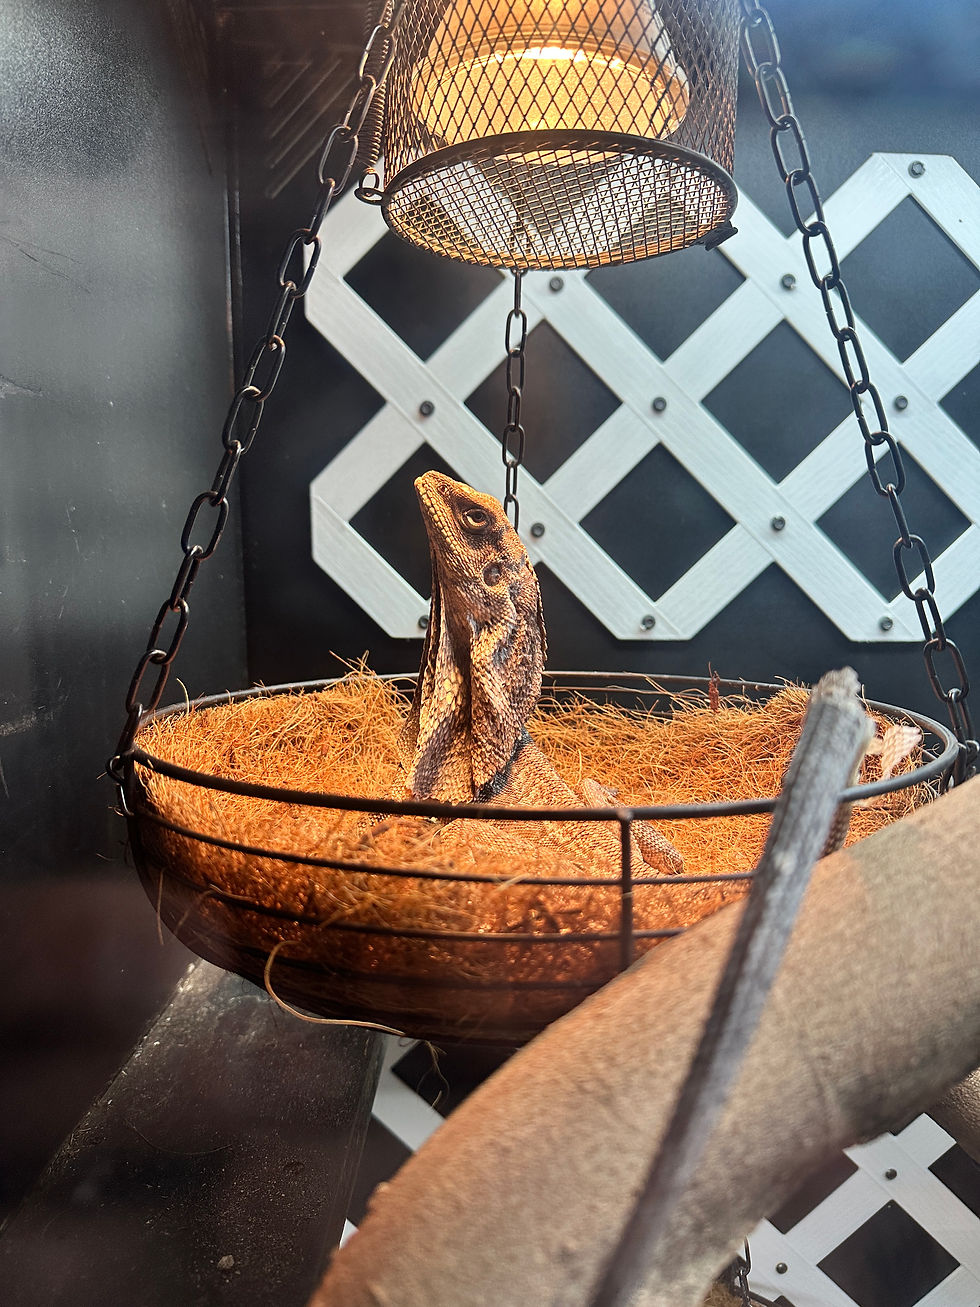
And then I began to explore different options that embraced both a philosophy of enrichment for the reptile and ease of cleaning for me. I found that bins with holes cut into the lids and then filled with potting soil and play sand were perfect for my Ackie Monitors. And it was super easy to just remove the bin, wipe down the enclosure, and then put the bin back in - as opposed to just putting substrate directly into the enclosure. I found that branches were great for my Frilled Dragons, but adding some ropes from Amazon into the enclosure gave a lot more climbing and jumping opportunities for the dragons. And coco-husk lined hanging plant baskets are friggin’ great for basking platforms for these guys too.
Flexible drainage tubes from Lowes work awesome when you place them over a PVC pipe perch in arboreal snake enclosures – hide in the tube, or perch on the perch.
I also found eggcrate to be a great enclosure liner for lizards. It allows them to grip and run and also an elevated position on the floor of the enclosure for just one more area to thermoregulate.

Oh and I solved one of the more tedious tasks associated with keeping Frilled Dragons – they prefer running water to drink from. And while the Mist King system helps, its on a timer and not always on. But plug in cat water fountains can be always on, and now all of my Frilled Dragons have a constant flow of water to drink from throughout the day.

In regards to my geckos, Cambro tubs are the go to now. Especially since Cambro makes tub lids that slide - I don’t need a rack system for the Cambro tubs. I simply purchased a storage rack on Amazon and put the tubs on the rack and access the geckos via the sliding lid. But please note, I do not recommend the sliding lids for snakes. The sliding part of the lid has a slight weak area in the middle that can be exploited by a curious little snake. I know because I used to have a beautiful pair of baby Gonyosoma prasinum. I only have one now. I am still hopeful that the other will reappear one day.

Also, pro-tip: don’t tell the wife when your reptile room is missing a snake.
Anyway, so yeah I’m pretty happy with things right now. Oh yeah, one more thing: Sim Container is my go-to for egg incubation. I didn’t buy an incubator tho. Some heat tape from Reptile Basics, a tiny little Herpstat and a cooler and fan from Amazon is all that I need - this is super easy for a small operation like mine.
To sum things up – here are the primary suppliers of Hatch-It Reptiles, LLC:
Black Box Cages – the best enclosures.
Animal Plastics – the only con of these enclosures is the lead time.
Sim Container – egg incubation and monitor lizards (I have a red Ackie named Bindi from these guys).
Spyder Robotics – the best thermostats.
The BioDude – the best for bioactive enclosures.
Universal Rocks – really cool stuff for that natural look.
Lowes and Amazon – the best for practical enclosure furniture and enrichment .

$50
Product Title
Product Details goes here with the simple product description and more information can be seen by clicking the see more button. Product Details goes here with the simple product description and more information can be seen by clicking the see more button

$50
Product Title
Product Details goes here with the simple product description and more information can be seen by clicking the see more button. Product Details goes here with the simple product description and more information can be seen by clicking the see more button.
$50
Product Title
Product Details goes here with the simple product description and more information can be seen by clicking the see more button. Product Details goes here with the simple product description and more information can be seen by clicking the see more button.
Comments